
If you are a developer or programmer like me. You end up staring at the Terminal most of the time. Or the Terminal might be much more of a bigger deal to you. So why not make it look good and customize it to your liking. Or at least make it less of a scary thing if you are a beginner in the command-line.
The Powerline looks much more modern and appealing than any other Terminal theme straight away. So, enough of talking, let’s make it as simple as possible to install the Powerline theme on your Terminal.


Step 1: Installation
We are going to use Bash-it in this tutorial to install the theme.
- First, make sure you have git installed. If not, install it on your system.
- Ubuntu(Debian) users:
sudo apt-get install git
- For Mac users:
- Download Git for mac installer
- Or install it via brew:
brew install git
2. While on the Terminal, execute the following command:
git clone --depth=1 https://github.com/Bash-it/bash-it.git ~/.bash_it
3. Now, run the installer by executing:
~/.bash_it/install.sh
Enter y if it asks to keep your .bashrc and append bash-it templates at the end?
If you have followed the steps correctly, Bash-it should be installed successfully. There’s one more thing before you apply the time, which is to install the proper fonts for the theme.
- Ubuntu(Debian) users:
sudo apt-get install git
- For Mac users:
- Download Git for mac installer
- Or install it via brew:
brew install git
git clone --depth=1 https://github.com/Bash-it/bash-it.git ~/.bash_it~/.bash_it/install.shy if it asks to keep your .bashrc and append bash-it templates at the end?Step 2: Installing the fonts
The Powerline theme requires some unique fonts to work correctly on your Terminal.
- While in Terminal download the fonts by:
git clone https://github.com/powerline/fonts.git --depth=1 fonts
2. Install the powerline fonts:
./fonts/install.sh
git clone https://github.com/powerline/fonts.git --depth=1 fonts./fonts/install.sh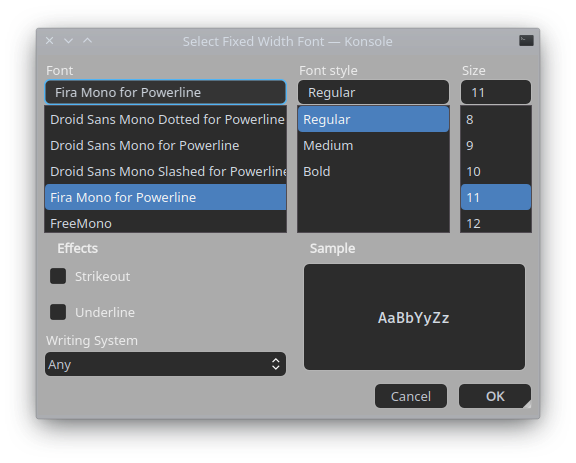
3.. Now change your terminal font by editing the current profile.
- Go to Edit > Preferences.
- In the General tab, enable Custom font and click the button to choose a font.
- Choose any font with ‘For Powerline’ at the end of its name. For example, Fira Mono For Powerline, Noto Mono For Powerline, or Source Code Pro For Powerline.
Now you are all set to apply the Powerline theme in your Terminal.
Step 3: Applying the Powerline theme
To apply the theme, you have to edit the bash configuration file (
.bashrc) in your home folder.- Open the bash configuration file using nano (make sure you are in the home directory by
cd).
nano .bashrc
(
.bash_profile or .profile on macOS)
2. Scroll down to the following line (131st line more or less).
export BASH_IT_THEME='bobby'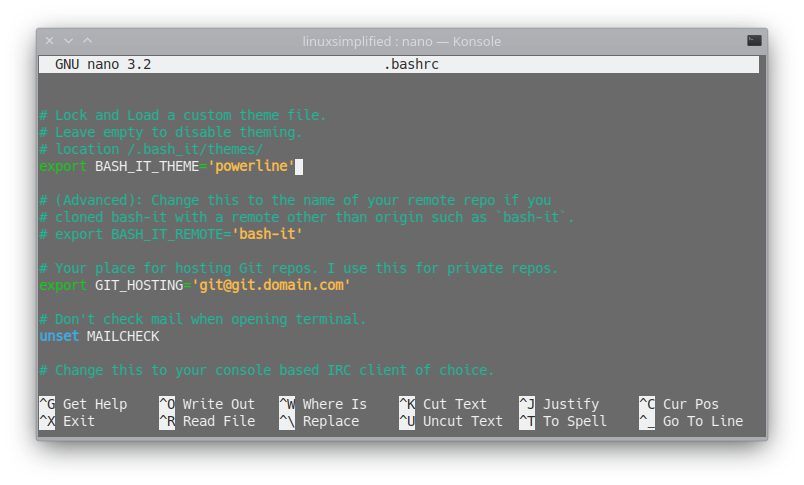
3. Now edit out ‘bobby’ with ‘powerline’.
4. To exit out nano press
Ctrl + x (⌘ + x on macOS), hit y to save changes and press enter.
5. Now close and reopen your Terminal, and there you are with the Powerline theme.
More Terminal Themes
Bash-it also comes with several different themes that you can use. Here are all the list of themes:

Changing themes is very simple. Just like Step 3, edit out the previous theme with the name of the theme you want to apply. Restart the Terminal and enjoy your new Terminal theme.
If you’re facing any issue installing the Powerline theme on your terminal, feel free to post a comment describing the issue.
Comments
Post a Comment