
If you are going to install Linux for the first time, or you have installed Linux before and want to install Ubuntu this time. This is going to be the perfect guide for you. We will take you through all the required steps to install it properly on your system.
Requirements for Linux Installation
- A Windows or Mac Computer
- Virtual Box – (Software required to install Linux without affecting your existing Operating System)
Ubuntu ISO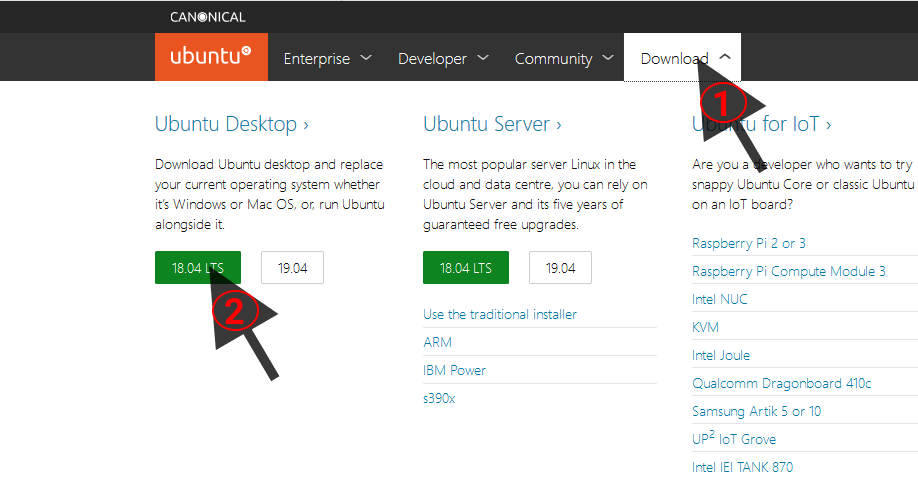
That’s all you need now, you are ready to begin the installation of Ubuntu Linux.

Installing Virtual Box
Install Virtual Box as you install any other program on your computer (Hit next, yes, accept, install). Stay with the default settings (change them only if you know what you’re doing) and wait for the installation to finish.
Once installed, you can now set up the machine for Ubuntu.

Setting Up the Linux Installation
- At the top-left click the new button.
2. Type name: “Ubuntu” in the popup window so that the virtual box knows that we are going to install a Ubuntu Linux and hit Next.
3. Now in this windows specify the amount of RAM you want to give to Ubuntu. I would recommend giving half the amount of RAM you have in your system (somewhere around 2048-4096MB will be enough for it). You can always increase or decrease the amount later if you want.
4. Select Create a virtual hard disk now and click Create.
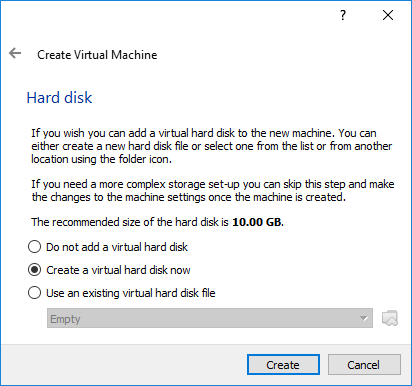
5. Select VDI (VirtualBox Disk Image) and hit Next.
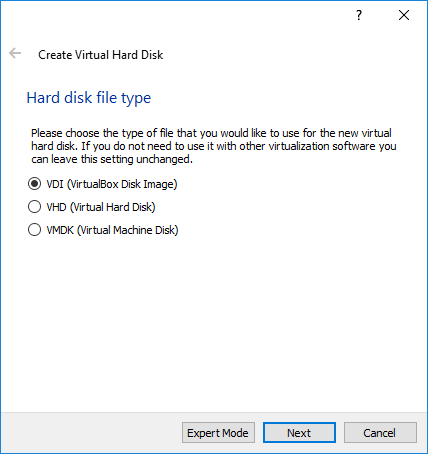
6. This window will ask if you want a dynamically allocated or fixed size hard disk. Recommended is dynamically allocated (so that it grows in size when the user needs more space rather than taking the full space instantly). Hit Next to confirm.
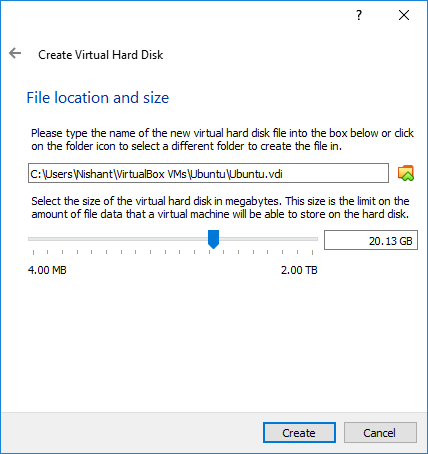
7. Now specify the hard disk size you want to give Ubuntu (Recommended is 20-30GB) and hit Create.


Finally: Installing Ubuntu Linux
Now, its time for the final most important part of installing our Linux Operation System
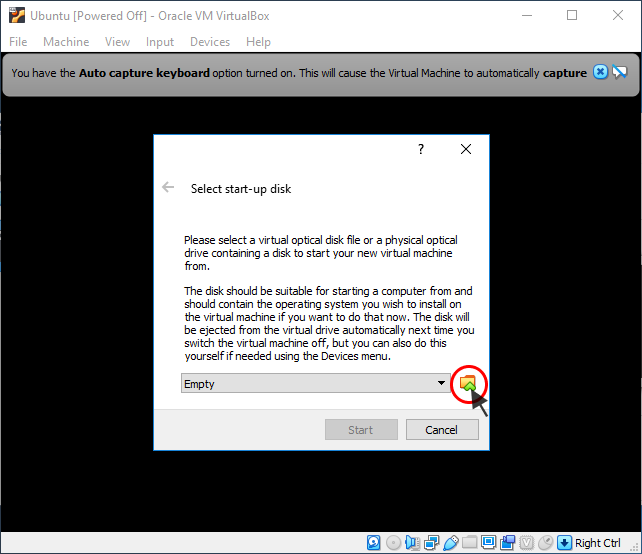
- If you have followed the previous steps properly, you will have a window similar to the image below. Hit Start to begin.
2. A pop up with a window will show up asking you to select a startup disk. Click the folder icon.
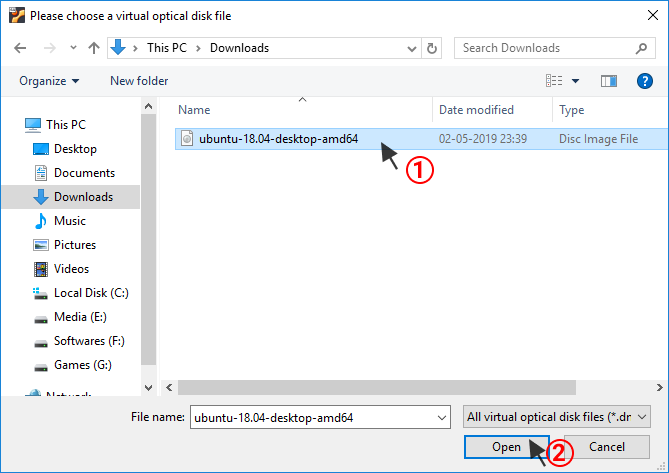
3. Select the ubuntu file in your Downloads folder and open it.
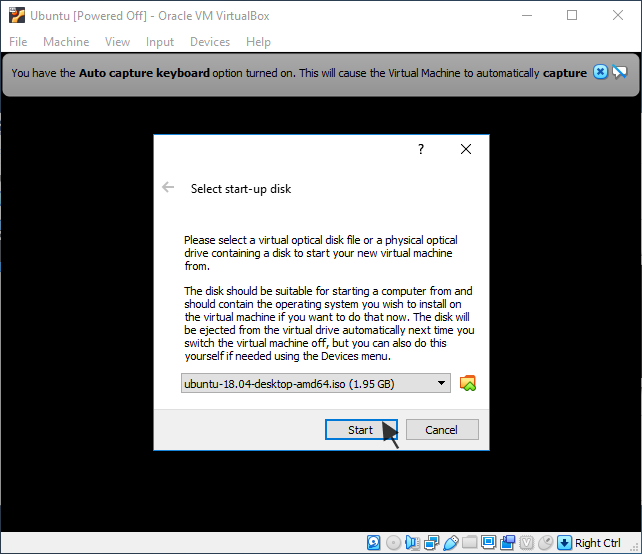
4. Hit Start.
5. Once the disk boots up (10-15sec), you will be asked whether to try or install Ubuntu. Click on Install Ubuntu.
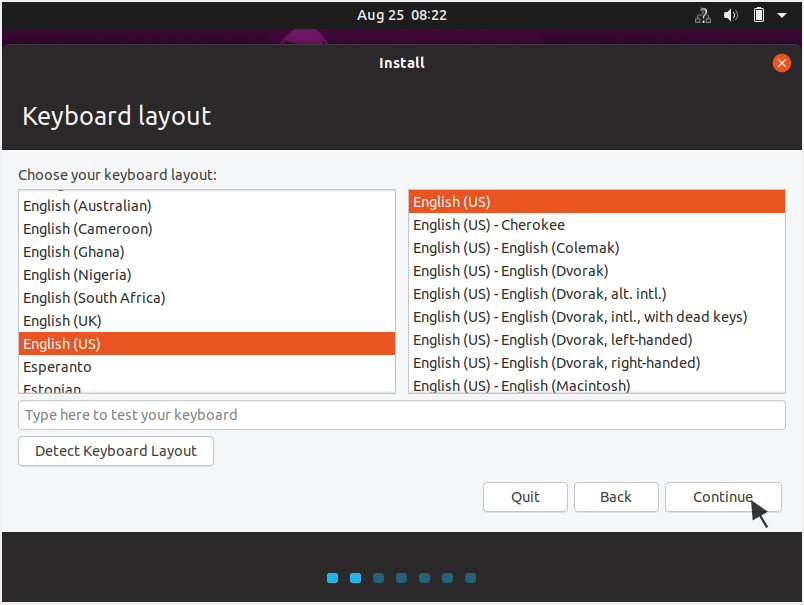
6. Select your keyboard layout and click Continue.
7. Select the Normal installation option (you can go with Minimal installation if you don’t like pre-installed softwares in your system) and click on Continue.
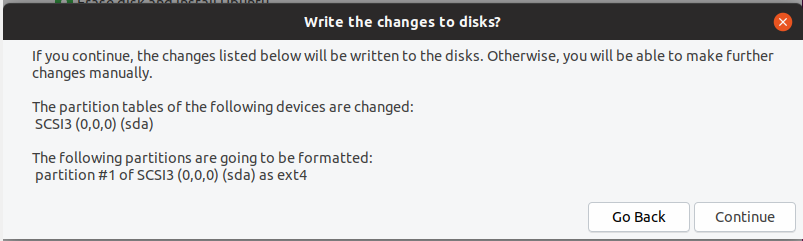
8. You will be asked to select the Installation type this time. Select Erase disk and install Ubuntu (don’t worry it will only erase the disk you created in the 7th step of setting up the installation) and hit Install Now.
9. Click Continue to confirm the changes.
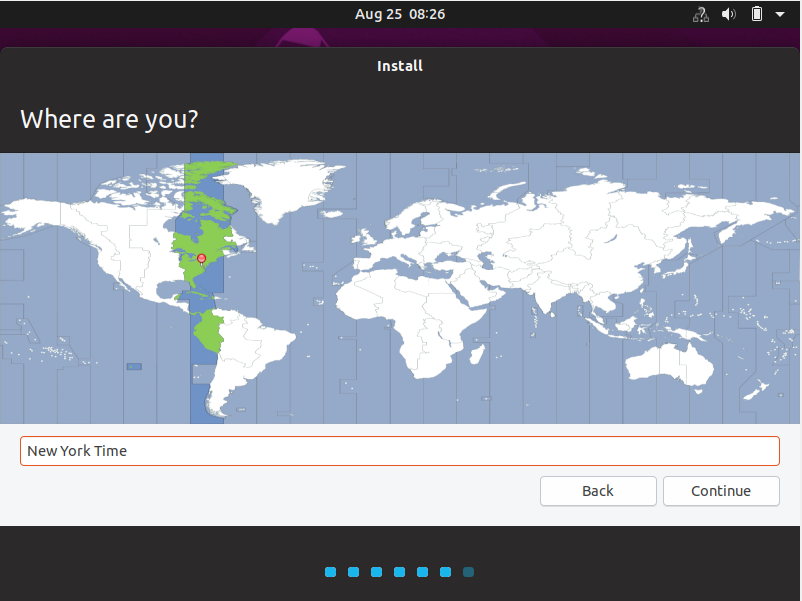
10. Select your time zone from the map (you don’t really need to if you’re connected to the internet) and click Continue.
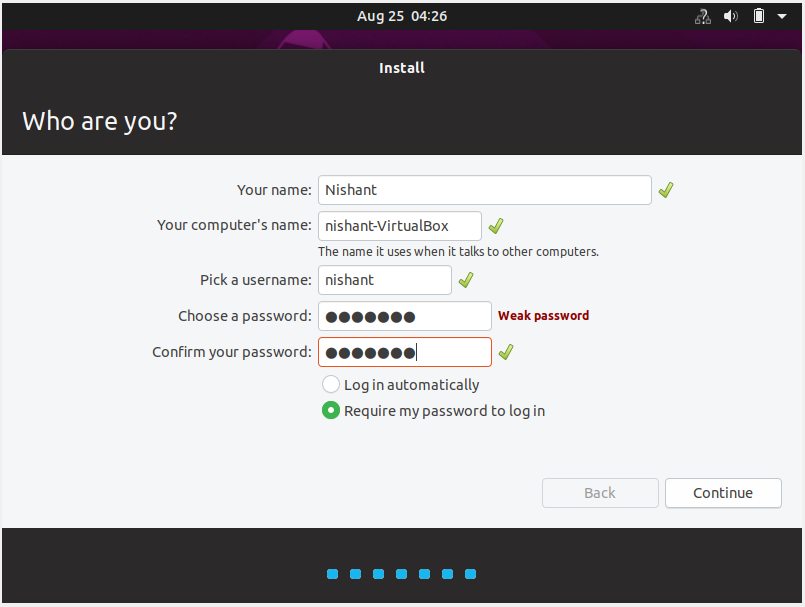
11. You have to fill out some basic information (like filling a signup form) and click continue. Anyways just remember the password.
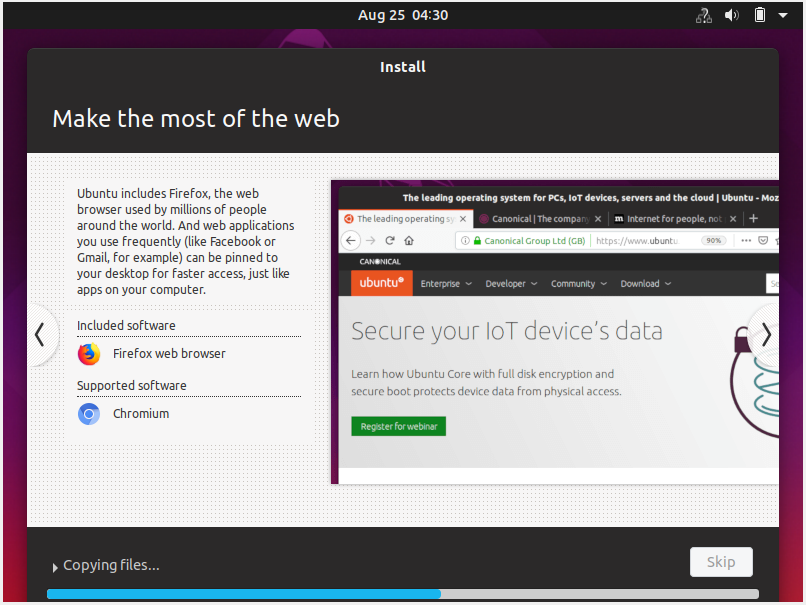
12. Now grab a cup of coffee and wait for 5-10 minutes for the installation to be finished.
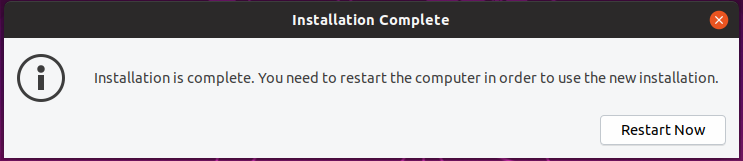
13. Once the installation is completed you will be asked to Restart the system. Before that, you need to remove the installation startup disk (you selected in the 2-3rd step)(so that when the machine gets restarted it do not begin the installation again). In the main menu navigate to Devices > Optical Devices and select Remove disk from virtual drive or Host Drive ‘x:’ (any one will work). Hit Restart Now.
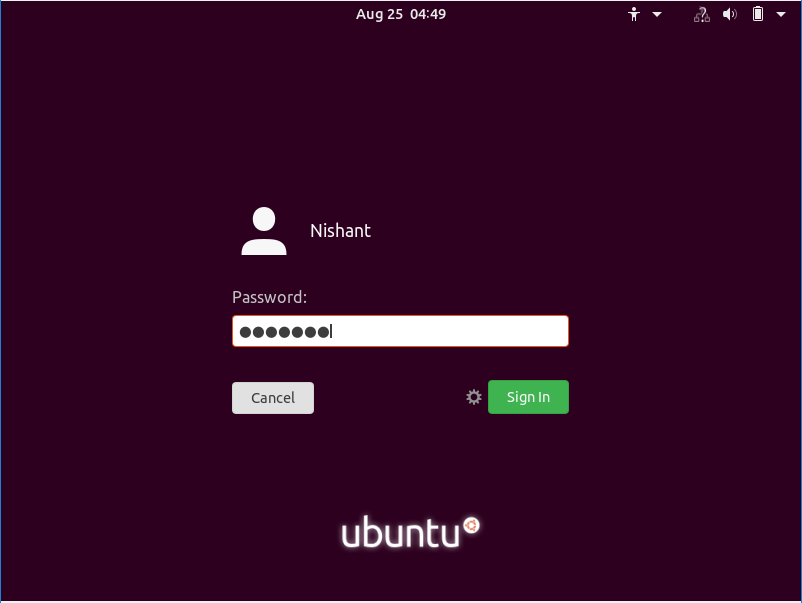
14. Now you have successfully installed Ubuntu Linux in your system. Wait for the login screen to come up. Enter your password and sign in to your system.
15. Go through the welcome screen and you can now enjoy your Ubuntu Linux experience. Tell me in the comments if you’ve faced any difficulty following the steps.


Comments
Post a Comment